Farming Life by the Farmer's Wife

Saturday, September 19, 2015

Banana Blondies Recipe

This recipe works so well and it's so tasty and addictive (but sweet!). It's also a great way to use up ripe banana's if you're sick of chocolate chip banana bread (like our family is). Sit down with a friend and a cup of tea on a rainy day and enjoy a few of these squares. Recipe by Cookies and Cups.


Banana Blondies
Makes 16 blondies

Ingredients
Blondies:
  • 1/2 cup butter, melted and if desired browned
  • 1 cup light brown sugar
  • 1 egg
  • 1 1/2 tsp. vanilla extract
  • 1/4 tsp. salt
  • 1 cup flour
  • 1/2 cup mashed banana (1 medium banana)
Brown Sugar Frosting:
  • 1/4 cup butter
  • 1/2 cup light brown sugar
  • 2 Tbsp. milk
  • 1 cup powdered sugar

PREHEAT oven to 350°F. Line an 8x8 baking dish with foil and spray with cooking spray. Set aside.

MIX in a bowl or stand mixer, melted (or browned) butter and sugar. Mix until combined. Add in egg and vanilla and continue mixing until incorporated. Stir in salt, flour and banana until batter is smooth and even. Spread in prepared pan.

BAKE for 25-30 minutes until center is set.

TRANSFER pan to wire rack to cool.

FROST the blondies when they are mostly cooled

Frosting:
1. In a medium saucepan melt butter. Add brown sugar and milk and stir until mixture comes to just a boil. Remove from heat, allow to cool for 5 minutes.
2. Stir in powdered sugar with a whisk adding more or less for desired consistency.
3. Spread on top of blondies and allow frosting to set and blondies to cool completely before cutting into squares.

NOTE: If you choose to brown the butter, melt butter in saucepan and continue cooking, once it's melted by swirling the butter in the pan until butter reaches a deep golden brown colour.
You can double the recipe and frosting easily if you need to use more than one banana. Just line a 9x13 pan with tin foil.


Saturday, August 29, 2015

Barn Board Necklace Organizer

Recently I purchased a good bunch of second hand costume jewelry (necklaces). I've never really been one to wear necklaces so I didn't have a spot for them (it was time for a change, and I wanted to start dressing pretty I guess). I scoured Pinterest and found a way to hang necklaces that I liked and was sooooooo close to stopping into a Homesense and buying one like it because I've seen them in the store before. So literally I was on my way out to town, and stopped at the barn to check the live trap (we have a raccoon problem) and happened to spot some small pieces of barn board laying in the pile of longer boards. I had totally forgot we had repaired a board a few years ago, so there was lots of little pieces left that we just kept. So a quick look in my odds and ends bucket, and I found some of the drawer pulls I removed from the bathroom cabinets to replace with new ones when we moved into the farm house. For some reason, they were all different designs and for some reason I kept them all. Here's my reason for keeping them I guess!


Barn Board Necklace Organizer:

What you need:

1. A space you can safely work with power tools and spray paint.

2. A piece of barn board cut to the size you need. Scrub it and wash it if required.

3. Doorknobs or drawer pulls in a design you like:

4. Flat ended screws in the length to fit thickness of wood and size to fit in knobs; cup hooks (optional); eyelet hangers (or another method to hang as required) - more on these below.

5. Spray paint (optional). I found this enamel paint by Beauti-Tone I thought would stand up to wear and tear pretty good.

6. Power drill and wood drill bits in the same or similar size to the screws.

7. (Optional) Multi-tip screwdriver.

The Steps:

1. Start by spray painting the knobs if that's the route your choosing to go, and allow to dry as per recommendations on the can before moving on to the next step.

This paint went on really thick and covered well. It also dried amazingly and the knobs turned out really neat.

2. Place the knobs where you want them to go and mark with pen. Then drill your holes with the power drill. Barn board can be hard and it may take some time to get through it depending on thickness of the board,

3. Mark and install the eyelet hangers (or your choice of hanger). You should measure so they are even to each other. I hardly ever measure - I eyeball it and hope for the best.

The kits come with a hanger and screw to install it. You can use your multi-tip screwdriver to drive the screws in.

4. Attach the knobs. You may need to use the power drill to drive the screws through the holes if you've used thick barn board like I did. Or else you'll have tired wrists after turning with a screwdriver.

The screws I found have a flat end so the screw can go all the way into the knob. The kit also came with some nuts and you can use these if the screws don't fit all the way into the knobs (each of my knobs had different depths and you can see some exposed metal from the screw - this is hidden however when the necklaces are put on them).

5. (Optional) Eyelet hangers are installed by twisting them into the wood. I wanted to use a few of these for the more delicate necklaces.

And that's it. Not including the drying time for the knobs, this whole thing took me about 20 minutes.
Now hang it on your wall and use away!

Sunday, August 09, 2015

I Hoarded My Kids' Things!

So for some strange reason that I have yet to understand, I decided to hold on to every piece of clothing both kids ever wore and most of their toys. Jenna is almost 8 and Jacob is almost 3. That equals a TON of clothes. Like I mean bins and bins and bins. Last week I sold the last bit of clothes that I had for sale, and I did feel relief. It wasn't just out of the blue one day that I decided I wanted to get rid of it all either. I did think through it and I did contemplate the possibility of having another baby, but It's just not something I can foresee in  our future. So make sure you have thought thoroughly about selling or donating your kids clothes. I realized the clothes were losing their value and could become outdated sitting down in our dingy basement. I had everything in Rubbermaid totes, but our basement is unfinished with a stone wall and it's damp. I was worried that eventually they would be ruined. Plus my constant need to de-clutter was on my mind.


What easier way to sell it all then to have a sale at our home and have people come to me? There was no way I was going to haul it bin by bin to a second hand kid clothing store and have them pick through only what they wanted, and  have to bring most of it home again (I'll explain more on that later). I knew I wanted each bin of a certain size to be sold all at once. Social media is a wonderful way to get other parent's thoughts about things, so I posted the question on Facebook if anyone would be interested in buying bins of clothes for around $30 each. I received a lot of positive response. And that's how it all started.
So I picked a day and time for a one-day sale, created a Facebook Event page and started sorting through clothes. This was the simplest way to get the information for the sale to the public. And it was easy to just post 
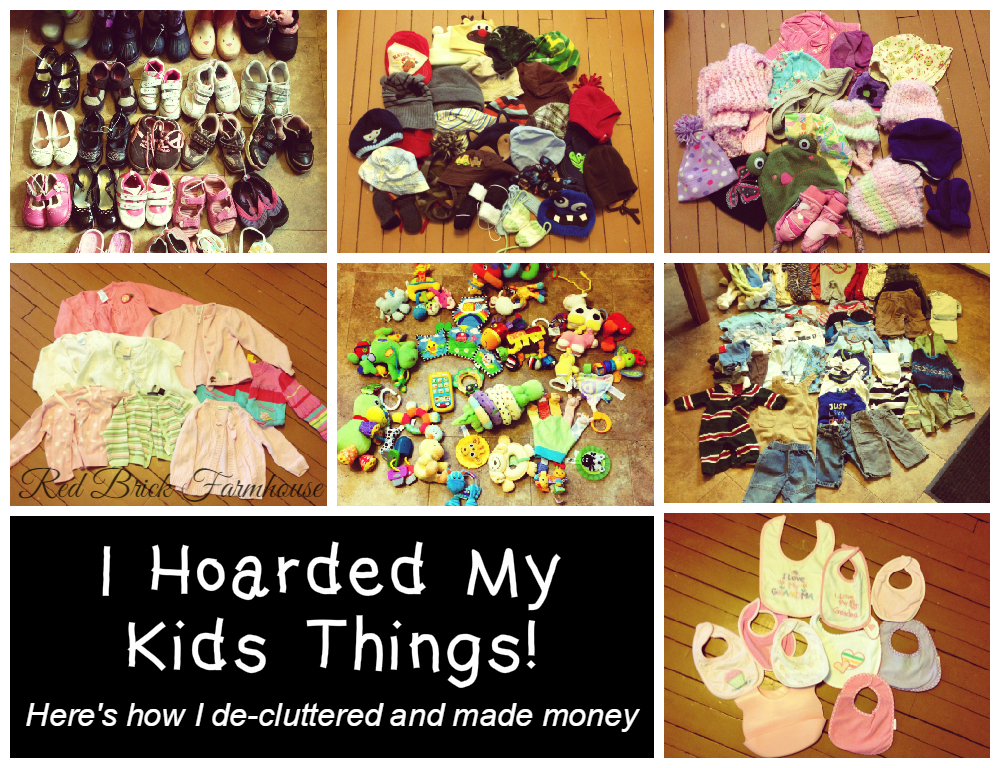
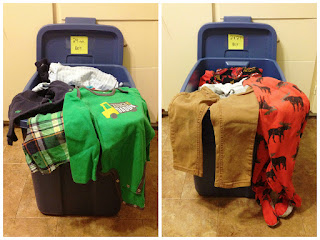
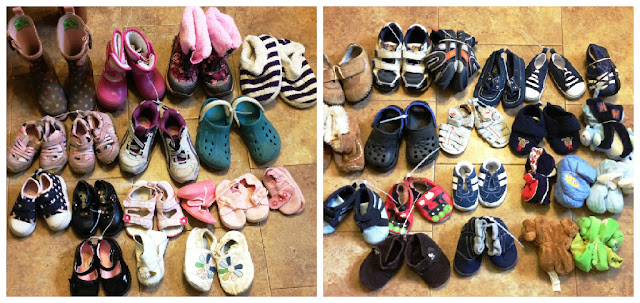
a photo of each bin of clothes or each item with the appropriate information (size, price, etc,) to the event page, and then share the event link to the buy/sell Facebook groups. A good picture means a lot too - make sure  you have good lighting. Lay items out on the floor and get a shot from above. If you aren't a member of a local Facebook buy/sell group, I suggest you try searching for some in the search bar at the top of the Facebook home page. It's a great way to purchase gently used items and to connect with other moms. But buyer/seller beware. You have to be careful how you do your business because there are scammers and inconsiderate people out there. I also created posters to match the Facebook Event profile picture (to be consistent and recognizable), and put them in areas frequented by parents, like our local Early Years Centre and Arena. Just make sure you ask for permission before doing this.

It took a month to sort and clean clothes and toys. Be prepared to invest a lot of time into doing this if you've held on to as much clothes and toys as I have. And if you do decide to keep everything your kids have ever worn or played with, be organized. At one point I had all the unisex clothes in one bin, but when I found out I was pregnant with Jacob (we didn't find out the gender), I dug them all out and then put them away with the boy clothes that didn't fit him anymore. They should have gone into their own separate bin. And keep outfits together. Even if the pants fit for a longer period of time, put them back with the shirt of the outfit when you put them in storage. I also recommend having a bin of just shoes, hats, socks, etc. where you can just throw those items that don't fit. Fill it with a starting and ending size and label it. I was finding so much of these items mixed in with the clothing and it was more time consuming to sort it all out.
I brought up bins from the basement four to five at a time and literally dumped each one out and started categorizing by size and gender. 
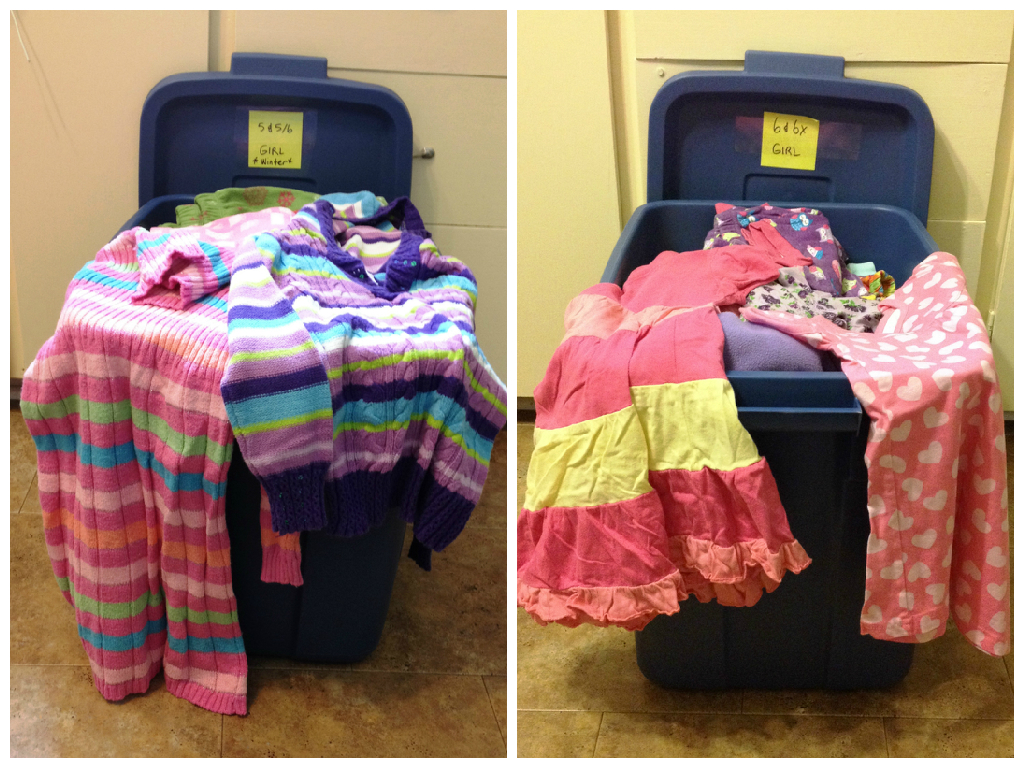
Baby sizes were sorted into groups by month sizes (0-3 months, 3 months, 3-6 months and so on). I labelled each bin as I went, or used Post-it notes on the floor if I was sorting a variety of sizes. Sizes 1-7 each had their own separate bin. I ended up with one full bin for each of these larger sizes. There was a good mix of half winter and half summer clothing styles.  Socks and shoes were also sorted by size and gender and as were hats and bibs. Dresses, snowsuits and coats were grouped by gender. And if you have a favourite outfit that you just can't give up, keep it. I did keep two to three of my favourites for each kid.
I found clothes mixed in with bins of the wrong size. This was because some clothes fit differently than others. So the size 12 month shirt made by Gymboree fit Jacob an extra 3 months longer than the size 12 month shirt made by Old Navy. The shirt that fit for the longer time period got put away with the next size up. So, just be mindful of the sizes when you put them away. What fits your child at a certain age may not fit another at the same age. It just helps make sorting more efficient if all sizes go together, no matter how they actually fit.
So how do you price everything? Take a look through a local second hand or gently used clothing store. Generally, thrift stores ask a little less than a gently used store. The "big name" stores seem to have the highest prices, but you are paying for better quality there. I had 68L Rubbermaid totes priced by how full they were; half-full was $25, below the rim was $30, and if it was crammed full it was $40. This was an excellent deal for 
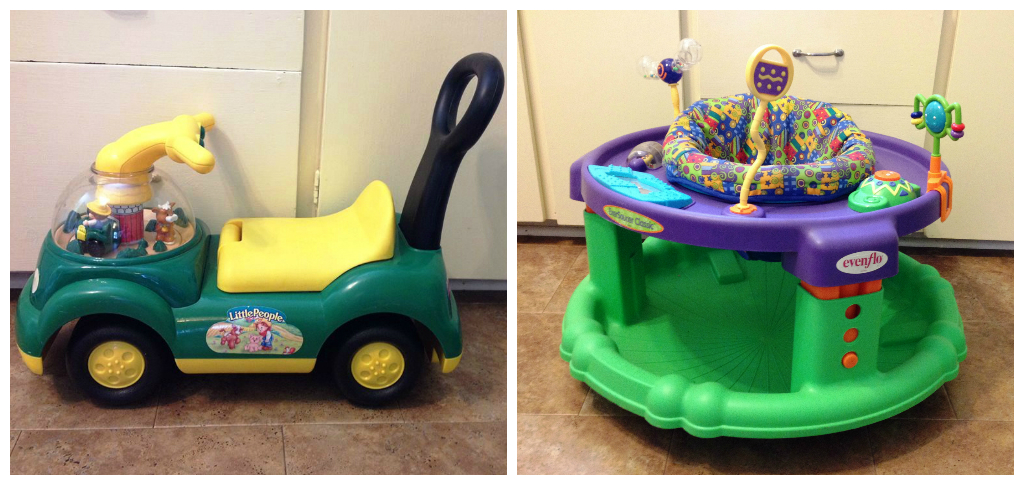
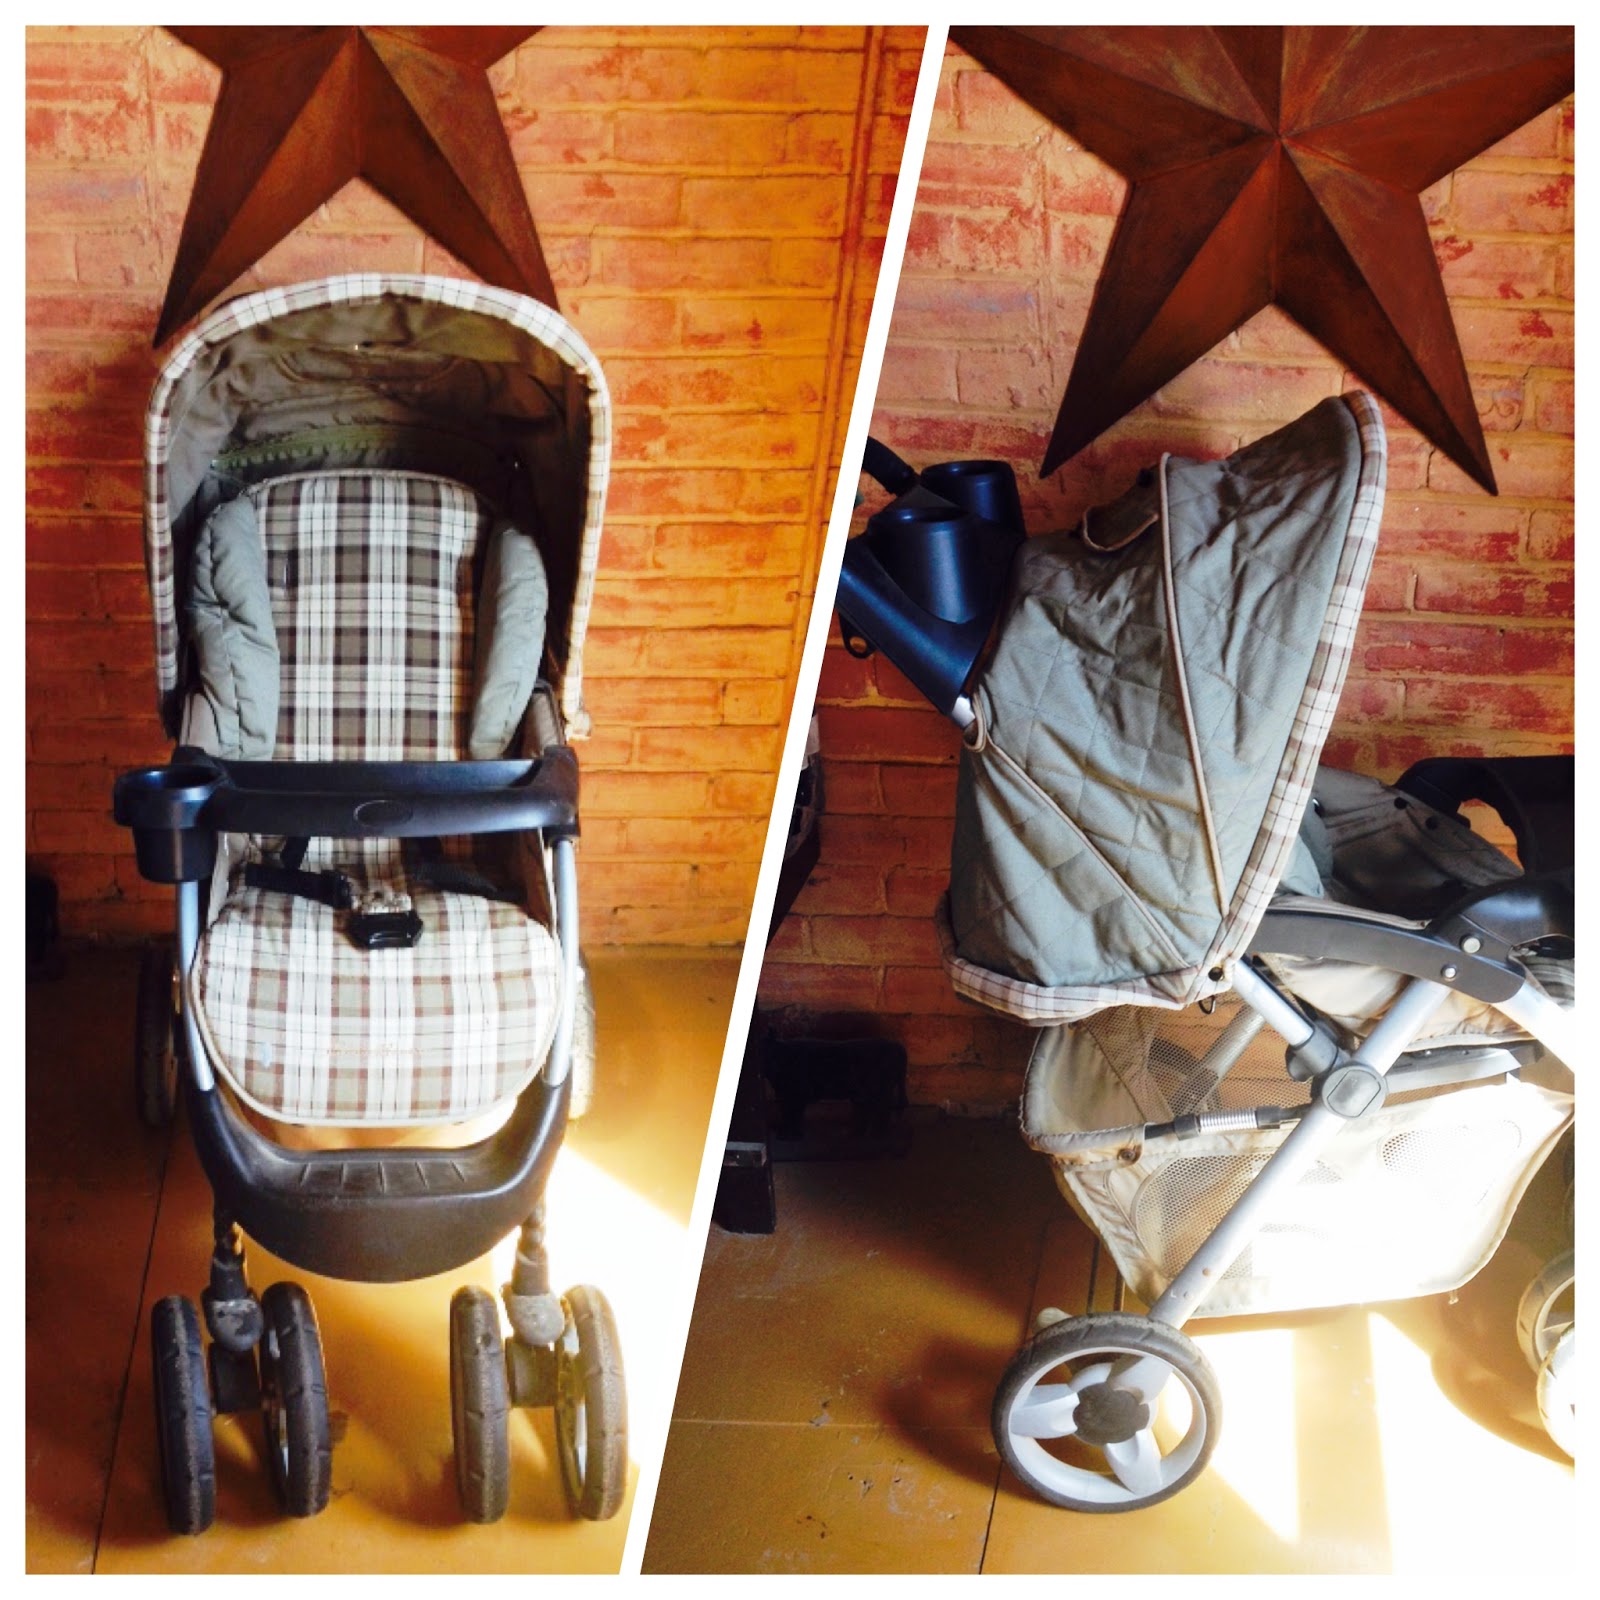
clothes in my opinion. Any of the larger items like my change table and Exersaucer, I compared to the second hand store and also looked at the condition, quality and how current the style of the item was. Be careful when selling items like car seats or baby walkers; these items follow strict safety standards. Do your research and make sure there are no recalls or legal ramifications to selling these things. It's illegal in Canada to sell a baby walker, even at a garage sale. Don't forget to check the expiry date on car seats.
If you decide to get rid of your kids' clothes and toys one day, I wish you only success if you decide to do it the way I did. I do not recommend it though. Sell or donate as you go if you can. Eventually I did donate quite a few items that didn't sell at the big sale to my local thrift store because there just wasn't any interest. Give yourself a timeline if there is something that isn't showing interest in selling. I started with a month and then went down to two weeks (I was still trying to sell items individually on the buy/sell groups after the sale.) I also filled my car one day of bins of clothes that didn't sell and took them to a gently used chain store - they buy clothes from you at a certain percentage of what they would sell them for. And they were extremely picky about what they took and I ended up filling my car full and bringing most of it home (all this after shopping at Costco first - BIG MISTAKE!) I'm not trying to make these businesses sound bad, because if you are shopping there for your own kids, the quality of clothing is excellent. It's just frustrating as a seller to be able to "get rid" of everything you brought in.

It can be one overwhelming endeavor to do what I did. Thank goodness I like to organize and sort and tidy things. Now my basement is in order the way it should be.

Thursday, August 06, 2015

Easy No-Fail Microwave Fudge Recipe

I discovered this tasty recipe on about.com/food by Elizabeth LaBau. I modified it once to make a butterscotch peanut butter fudge (it tasted like the butterscotch coloured marshmallow squares the old ladies like to make!) This recipe makes semi-sweet chocolate fudge, but I'll make a note of where to change the recipe.


Easy No-Fail Microwave Fudge
Prep: 5 min  |  Total: 5 min.
  • 3 cups semi-sweet chocolate chips (or 2 cups caramel chips & 1 cup peanut butter chips)
  • 1 14-oz can condensed milk
  • 1/4 cup (4 tbsp) butter
  • 1 tsp vanilla extract
  • 1/4 tsp salt

1. Prepare an 8x8 pan by lining it with aluminum foil and spraying the foil with nonstick cooking spray.

2. In a large microwave-safe bowl, combine the chocolate chips, condensed milk, and butter. Microwave in one-minute increments until melted, about 2-3 minutes.

3. Stir to ensure all the chocolate is melted, then add the vanilla and salt. Stir until the candy is smooth and well-mixed. I omitted the vanilla and salt for the butterscotch fudge.

4. Pour the fudge into the prepared pan and smooth it into an even layer.

5. Place the fudge in the refrigerator to set for at least 2 hours. Once set, cut into 1-inch squares and serve at room temperature. Store excess fudge in an airtight container in the refrigerator.

Wednesday, August 05, 2015

I Didn't Realize How Lucky We Were

If you love watching the sky and the clouds, then the past few days has been a real treat for you. This shifting of the sky has also brought some incredibly bad storms and in the almost 6 years we've lived on the farm, I've never seen anything like it before.


We all sat outside on the front porch watching the storms go by Sunday afternoon. There were two fairly major storms that went through within a few hours of each other. The first one was in the late afternoon - the sky turned green and the wind picked up. And the thunder, I couldn't get over the thunder; it just kept rolling and rolling. We probably should have taken cover in the basement. We were lucky we didn't need to. Reports came in that a large tent collapsed on people at a party and some were injured.

We went out and checked the crops for damage after this first storm passed. Two years ago there was a horrible wind storm that went through and knocked over some of our corn crops.

Two years ago: The left photo is a corn field after the storm; Right photo is a week after that.
Lucky for us, we really only found a bit of canola had gone down and a few tops of corn stalks broke off. Oat fields fared much worse and almost entire fields were down flat. We don't grow oats.


We lost hydro during the first storm and it came back on a few hours later. We were lucky it did - some people, even neighbours (on another grid), had gone without hydro for around 20+ hours. The second big storm came through just before 10:00 that night. Strobe lightning and a locomotive sounding wind came with this storm. There was a confirmed touchdown of a tornado in the area. We did go inside when we heard the eerie sounding wind. It's scary when you can hear but can't see something like that.

And then the clean-up the next day: I had a few branches and not a single limb to pick up. We were lucky, some people were not. I saw images taken the morning after of one home almost completely destroyed by what was apparently a tornado. Tornado damage like that is rare where we live, but seems to be occurring more every year. It also rained 2" and the ground was able to soak it in nicely.

Heavy rains usually wash out crop material from the field (corn cobs, corn stalks - things that don't decompose quickly and float with the rain water). It ends up on the lawn and I rake it up so it doesn't go though the mower. Well, as I was working away and next thing I knew, there was Jacob, knee deep in the biggest mud puddle on the farm. At the time, I felt unlucky because I knew I would have to clean him up, but I bet he thought he was one lucky guy to get away with it.


So when I was putting my garden tools away and cleaning up toys outside, I stumbled across some rusty metal sticking out of the lane. The storm had washed some gravel away and exposed a part of the object. Of course I had to see what it was! I grabbed my shovel and dug it up and look what I found!:


I'm going to try to see if I can get it cleaned up a bit and hang it over a door. Isn't that what people do with horseshoes for good luck?

And lucky me, the sky continues to make a brilliant show, even last night:

I will always remember how lucky and blessed we are to live in a safe home and won't ever take for granted the power of nature.